Air Frequency Monitoring is certainly a very interesting hobby, but there is still a need for a larger financial input for basic equipment. That's why I would like to mention an interesting way for air traffic monitoring at a cost of about 8 euro. Surely you've met sites such as flightradar24.com and etc., which are displaying the position of planes on a map background using the 1090 MHz ADS-B signal reception. These are aircraft data that are ready for you and available for one click, but why not try to make a similar surveillance system at home? All we need is a simple USB DVB-T tuner that has R820 or R820T chip. If you visit the eBay.com and write there "USB DVB-T R820", you will definitely find a lot of tuners that have this chip built in and cost around 7 euro. This is actually the biggest input you give into project. If you have a DVB-T tuner, just follow the instructions or links below. And the bonus could be that the flightradar24.com portal let you add your own sensor (just connect it into the Internet, for example, using Raspberry) into their network and you get access to the paid section for free (https://www.flightradar24.com/share-your-data) :
Windows
Insert the DVB-T tuner into the PC's USB interface.
Do not install any added CD driver added to the DVB-T tuner!
Click "Right - My Computer - Manage - Device Manager - and most likely a USB device". That should be the DVB-T tuner. If you install the driver automatically for this device, you must uninstall it.
Download the whole zip. file sdrsharp and unzip it.
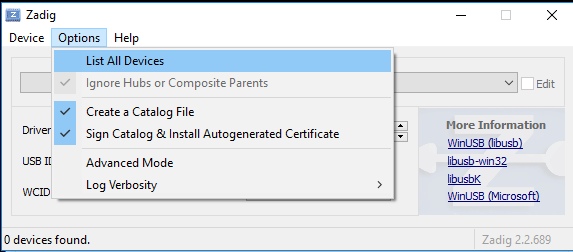
In the sdrsharp folder, select zadig.exe and run it.
Click Options and List all devices.
The device labeled RTL2838UHDIR or the one that identifies your DVB-T tuner should appear in the drop-down box below.
In the window should be written: WinUSB (in ...). If not, then set that up and click to “Reinstall driver”. By doing this an ADS-B decryption driver should be installed.
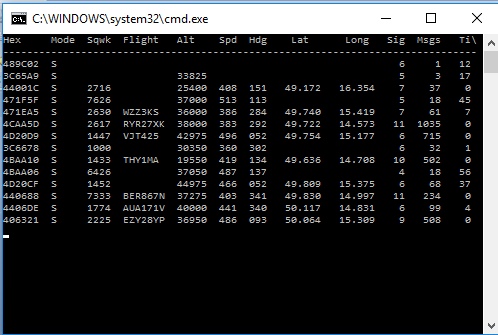
Download file dump1090. Unzip it and run dump1090.bat. Program should be runing in the command line and begin to write flights. (If you are within range of an airplane - if not, try to pull the antenna from the DVB-T tuner out of the window, on the balcony, etc.)
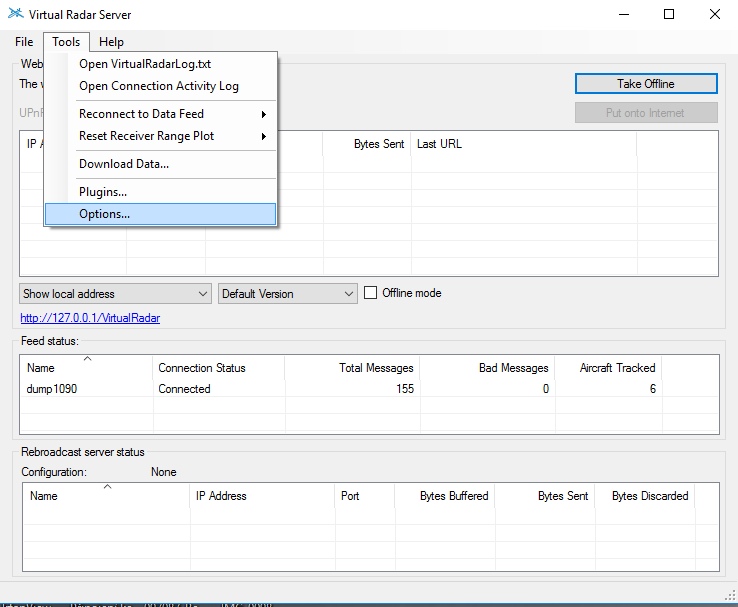
From the Internet, download and install the Virtual Radar Server to convert the decoded data into the graphical form.
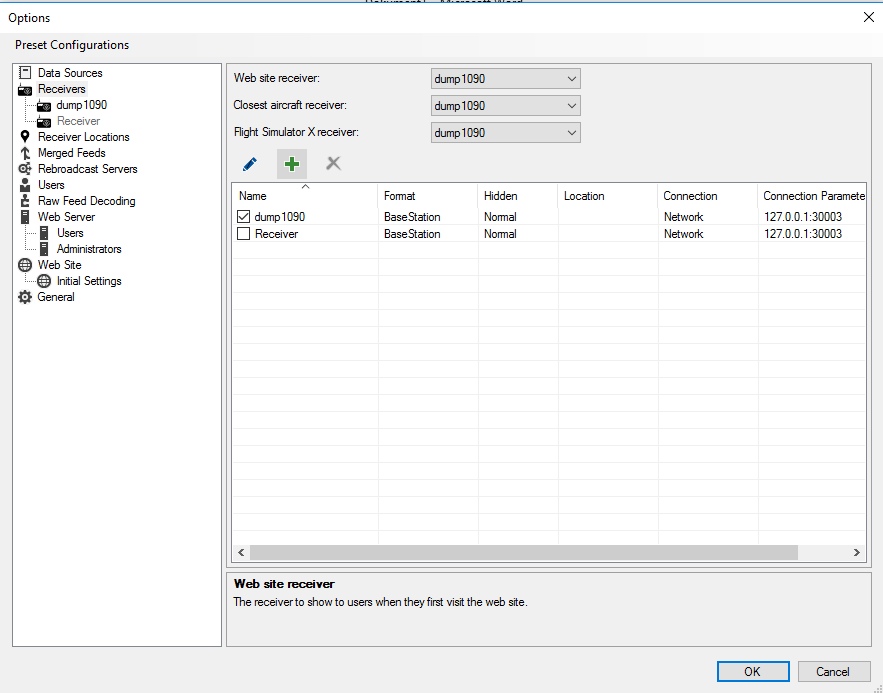
Open VRS, make sure you're connected to the Internet, and open Tools - Options-Receivers in the menu - "Green Plus". Only type a name in the Name field. Otherwise, it should be all by default.
According to the picture, set all 3 drop-down items to receivers according to how you named your receiver, in my case dump1090. And uncheck the receiver and check the created "dump1090" receiver.
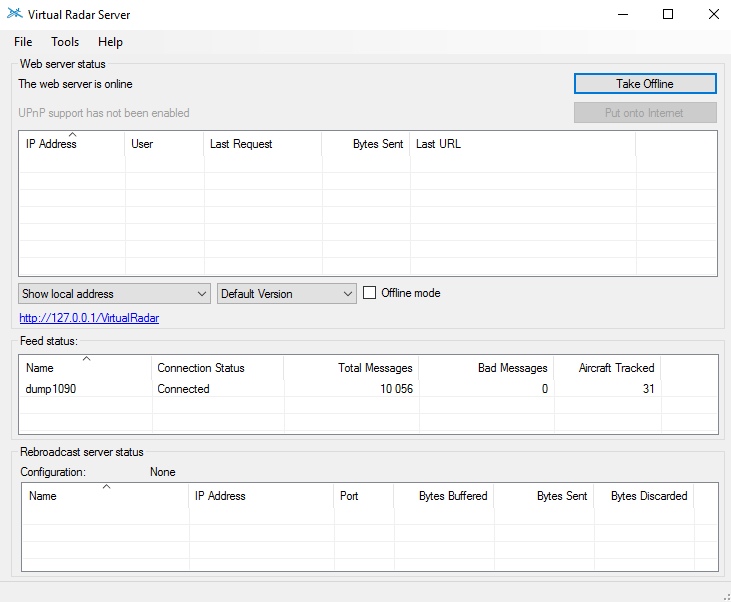
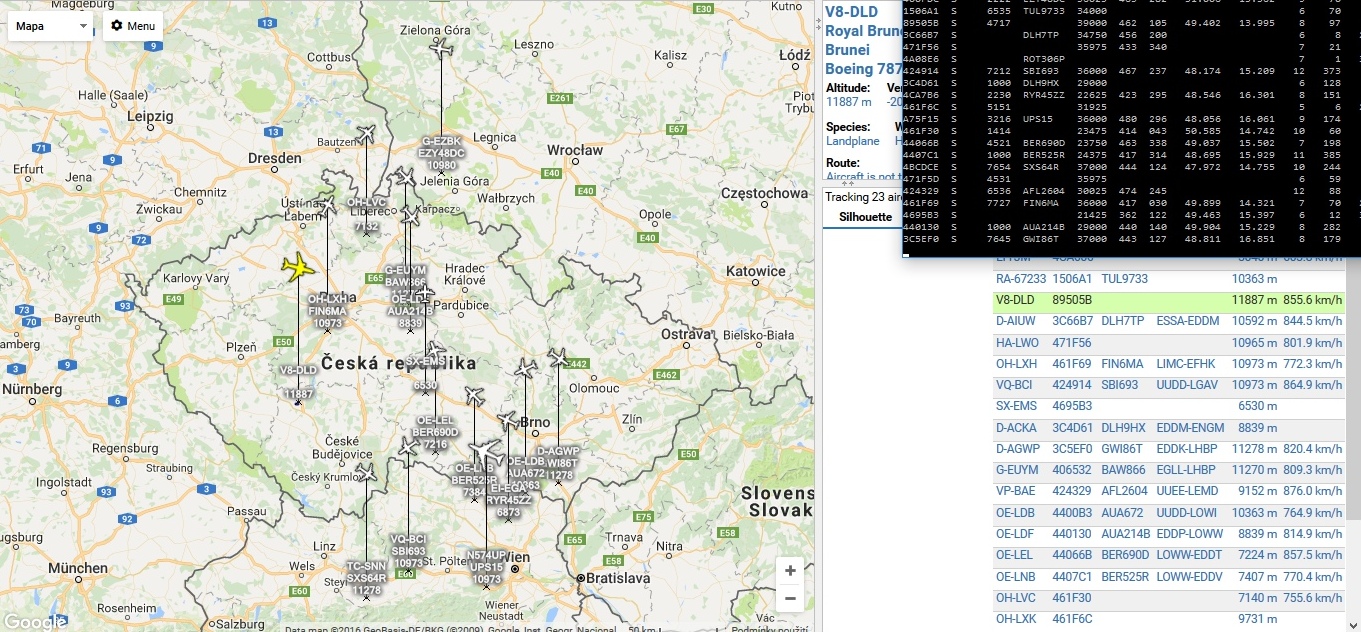
Save and check the start page if it is same as page in the image. If so, run the blue link http://127.0.0.1/Virtualradar.
And let's go :-)
Linux
If you have Linux, I attach a link to Linux – have patience and try all the commands, eventually I ran that too :-)
New antenna
The antenna that comes with the DVB-T tuner is inappropriate for physical features, but it's true that ADS-B can be received by using it (if you are outdoor in an open area). A much better alternative is to make the antenna with a price up to 7 euro.
All you will need is a 50Ω coaxial cable with a solid center conductor and the copper braiding and reduction to the DVB-T (F-MCX adapter F-Type jack female to male plug MCX RF Coaxial Connector Adapter - again can get cheaply on eBay).
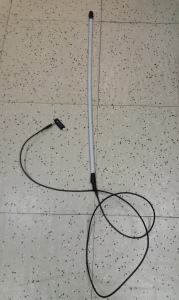
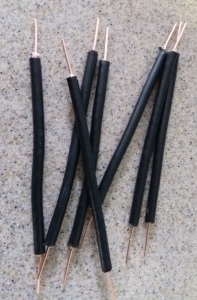
The collinear antenna we are going to make is made of segments which are long according to multiples of wavelength. We will prepare 10 segments that are 11 cm long and at the ends we will leave about 1 cm of overlap, which will be cutted on solid center conductor (total approx. 13 cm).
Individual segments will be connected together so that the center conductor of one segment passes between the shield/copper branding and the rubber casing of the other's segment, as well as the center wire of the other segment into the first one (see Figure). When connecting each segment, check with the multimeter that the shielding cable is not short-circuited.
To the last segment connect the remaining coaxial cable, one end put into the antenna (as well as the individual segments) and on the second end give the F female connector.
The antenna can be composed from as many segments as we want, I made it out of 9 and I put it all in the PVC tube using a vulcanizing tape at the end.
The whole guide is on the video below.